Step 1: Setup Unreal Engine project
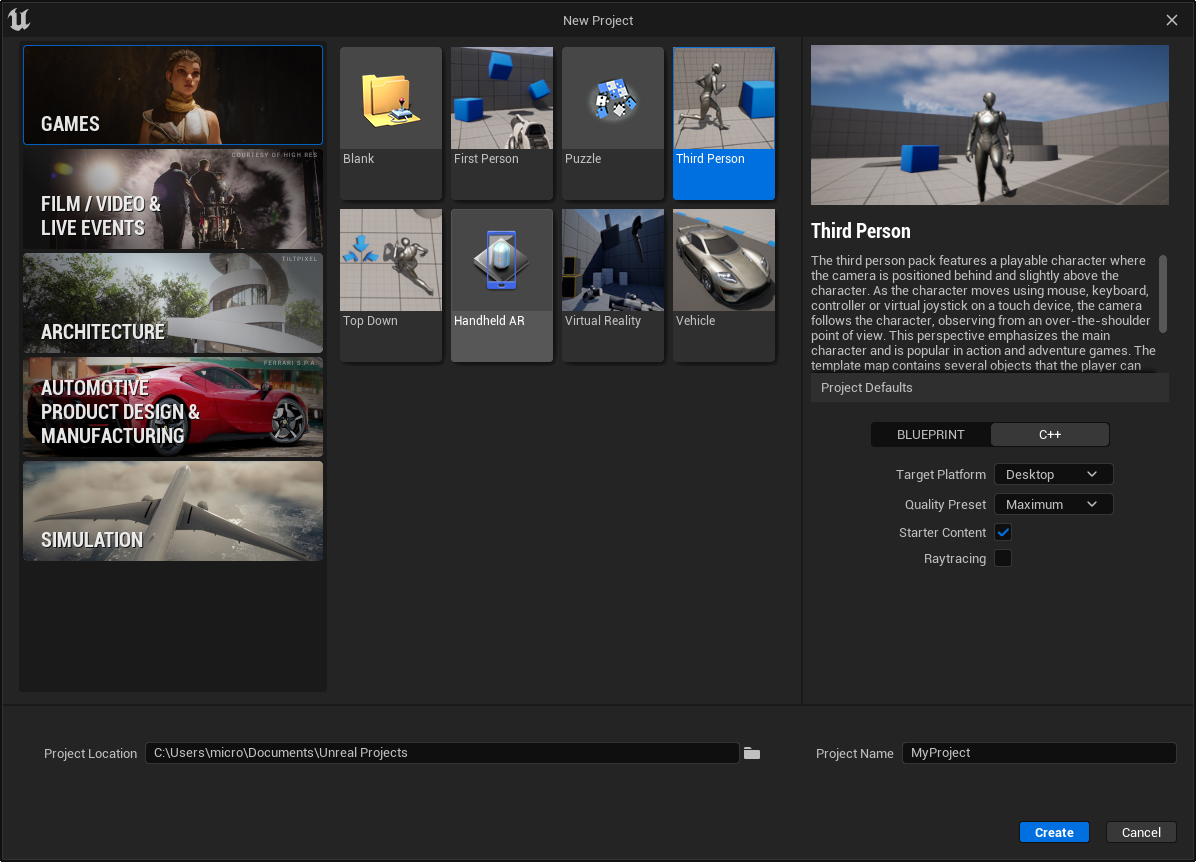
We'll use the third-person template from Unreal Engine. All the components come with networking out of the box. These steps also apply to any other Unreal Engine games.
If you're following this guide on an existing project, ensure that your project is version controlled before making any changes.
Authenticate with GitHub Container Registry
We need to authenticate with the GitHub Container Registry (GHCR) to be able to pull the Unreal Engine Docker image.
- Make sure you already have Unreal Engine GitHub Access here.
- Authenticate with these instructions.
Create project from template (or bring your own project)
- Create a third-person template with the C++ version. We'll create a guide for using Blueprints instead of C++ soon.
- Set Quality Preset, Starter Content, and Raytracing to anything.
- Click Create.

- Open the Visual Studio project by clicking Tools > Open Visual Studio.

Add server target
We need to add a target so you can compile your game as a dedicated server to run on Rivet.
Create a file at Source/MyProjectServer.Target.cs with the following. Replace MyProject with your project's name.
Source/MyProjectServer.Target.cs
using UnrealBuildTool;
using System.Collections.Generic;

public class MyProjectServerTarget : TargetRules
{
	public MyProjectServerTarget(TargetInfo Target) : base(Target)
	{
		Type = TargetType.Server;
		DefaultBuildSettings = BuildSettingsVersion.V2;
		IncludeOrderVersion = EngineIncludeOrderVersion.Unreal5_1;
		ExtraModuleNames.Add("MyProject");
	}
}